MASS Video Stream — User Guide
MASS Video Stream (MVS) is a software gateway developed by Magos Systems that bridges the MASS radar surveillance platform with standard IP video protocols. MVS captures live radar display frames from the MASS web interface and re-publishes them as a continuous video stream — enabling integration with NVRs, VMS platforms, and any video client that supports RTSP, ONVIF, or MJPEG.
Getting Started
Prerequisites
| Requirement | Details |
|---|---|
| Windows Machine | A Windows host running Windows 10, Windows 11, Windows Server 2019, or Windows Server 2022 |
| MASS Server | A running MASS installation accessible over the network (HTTP or HTTPS) |
| Network | MVS host must be able to reach the MASS server (HTTP/HTTPS) and vice versa |
| Ports | Ports 8085 (ONVIF), 8554 (RTSP), and 5000 (MJPEG) must be open on the MVS host firewall |
| Browser | The dashboard is browser-based; any modern browser (Chrome, Firefox, Edge) |
Accessing the Dashboard
The MVS configuration dashboard is a web application served directly by the MVS service. Open a browser and navigate to:
http://<mvs-host-ip>:3002
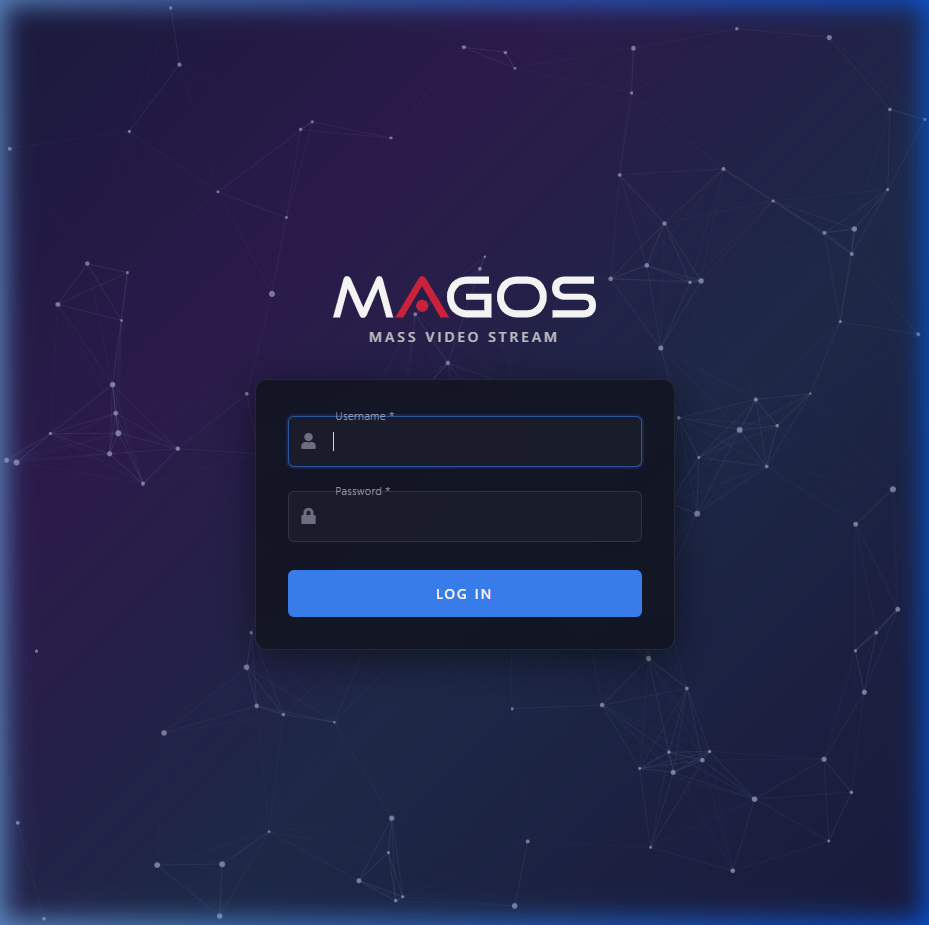
Logging In
Starting with v4.1.0, the dashboard requires authentication.
| Field | Description |
|---|---|
| Username | Your dashboard username (default: admin) |
| Password | Your dashboard password (default: password) |
Enter your credentials and click LOG IN.
After your first login, it is strongly recommended to change the default credentials. See Credential Management for instructions.
Dashboard Overview
The MVS configuration dashboard is a single-page web application that provides full control over all streaming and integration settings.

Header Bar
| Element | Description |
|---|---|
| Status indicator | A colored dot showing the streaming service health. Green = running normally |
Logs icon (>_) | Opens the Application Logs panel |
| Settings icon (⚙) | Opens the Change Dashboard Credentials dialog |
| Logout icon (→) | Ends your session and returns you to the Login page |
Status Indicator
| Color | Meaning |
|---|---|
| 🟢 Green | Service is running and streaming normally |
| 🔴 Red | Service has stopped or encountered an error |
| 🟡 Yellow | Service is starting or restarting |
Changes made in any card do not take effect until you click Save. The streaming service will briefly restart when you save.
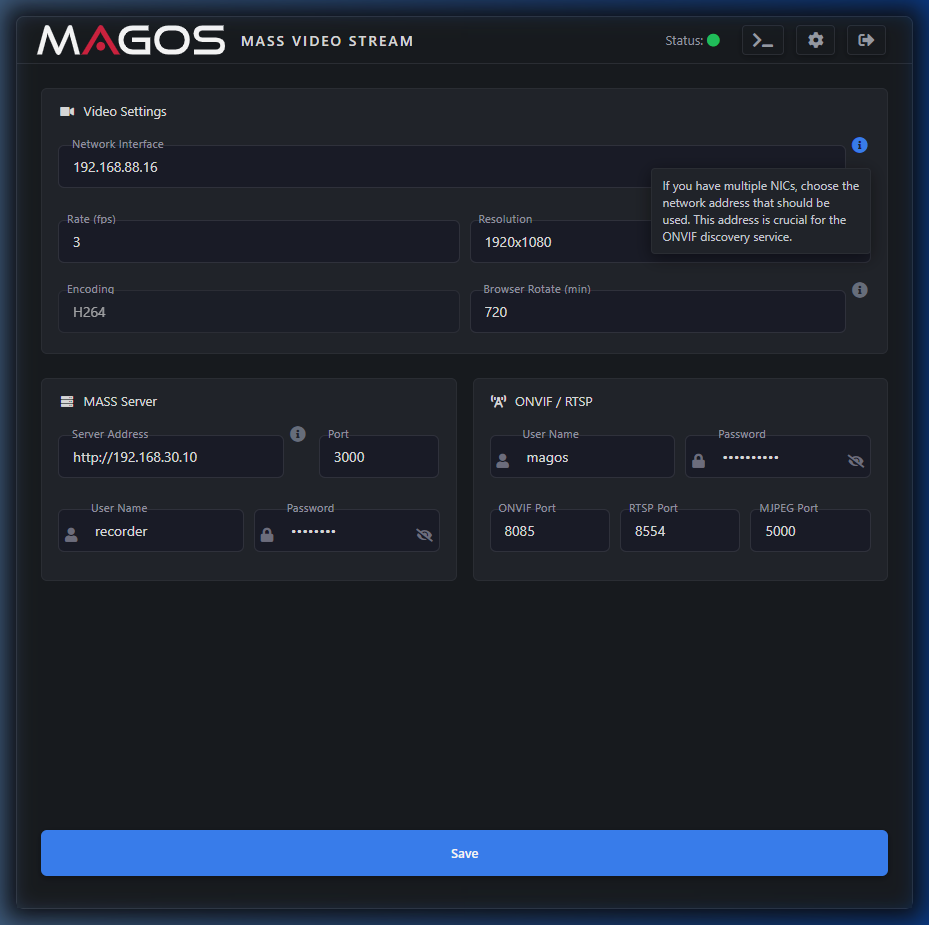
Video Settings
The Video Settings card controls how MVS captures frames from the MASS web interface and encodes them for streaming.
| Field | Type | Description |
|---|---|---|
| Network Interface | IP address | The IP of the NIC used for streaming. Critical for ONVIF discovery when the host has multiple NICs. |
| Rate (fps) | Integer | Frames per second captured from the MASS web UI. |
| Resolution | String (WxH) | Resolution of the captured video. |
| Encoding | Codec string | H264 (constant) |
| Browser Rotate (min) | Integer (minutes) | Periodic headless browser restart interval to prevent memory growth. 0 = disabled, 720 (12 hours) |
The Network Interface address is used by the ONVIF discovery service to advertise the stream. If you have multiple NICs, you must select the IP address of the interface reachable by your NVR/VMS.
MASS Server
The MASS Server card contains the connection details that MVS uses to connect to the MASS radar platform backend.
| Field | Type | Description |
|---|---|---|
| Server Address | URL or IP | Address of the MASS server. Supports http:// and https:// prefixes (since v4.1.0). |
| Port | Integer | TCP port of the MASS server. Default: 3000. |
| User Name | String | MASS platform username (not the MVS dashboard credential). |
| Password | Password | MASS platform password. Use the eye icon (👁) to reveal. |
If your MASS server uses TLS (HTTPS), enter the full https:// URL in the Server Address field.
After saving, check the Status indicator — a green dot confirms MVS has connected to MASS and started streaming.
ONVIF / RTSP
The ONVIF / RTSP card configures the streaming server that publishes the captured radar video via RTSP, ONVIF, and MJPEG.
| Field | Type | Default | Description |
|---|---|---|---|
| User Name | String | — | Username for RTSP/ONVIF client connections. |
| Password | Password | — | Password for stream access. |
| ONVIF Port | Integer | 8085 | Port for ONVIF discovery and device service. |
| RTSP Port | Integer | 8554 | Port for RTSP streaming. URL: rtsp://user:pass@host:8554/stream |
| MJPEG Port | Integer | 5000 | Port for MJPEG HTTP streaming. URL: http://host:5000/stream |
Prior to v4.1.0, changing the MJPEG port had no effect. This has been corrected — the configured port is now applied.
Credential Management
Click the Settings icon (⚙) in the dashboard header to open the Change Dashboard Credentials dialog.

| Field | Required | Description |
|---|---|---|
| Current Password | Yes | Your current dashboard password (for authorization). |
| New Username | No | New username for dashboard login. Leave as-is to keep current. |
| New Password | No | New password. Leave empty to keep current. |
| Confirm New Password | If new password set | Must match New Password. |
Click Update Credentials to apply. After a credential change, your session may be invalidated — log back in with the new credentials.
Change the default credentials (admin / password) immediately after first installation.
Log Viewer
Click the Terminal icon (>_) in the dashboard header to open the Application Logs panel.
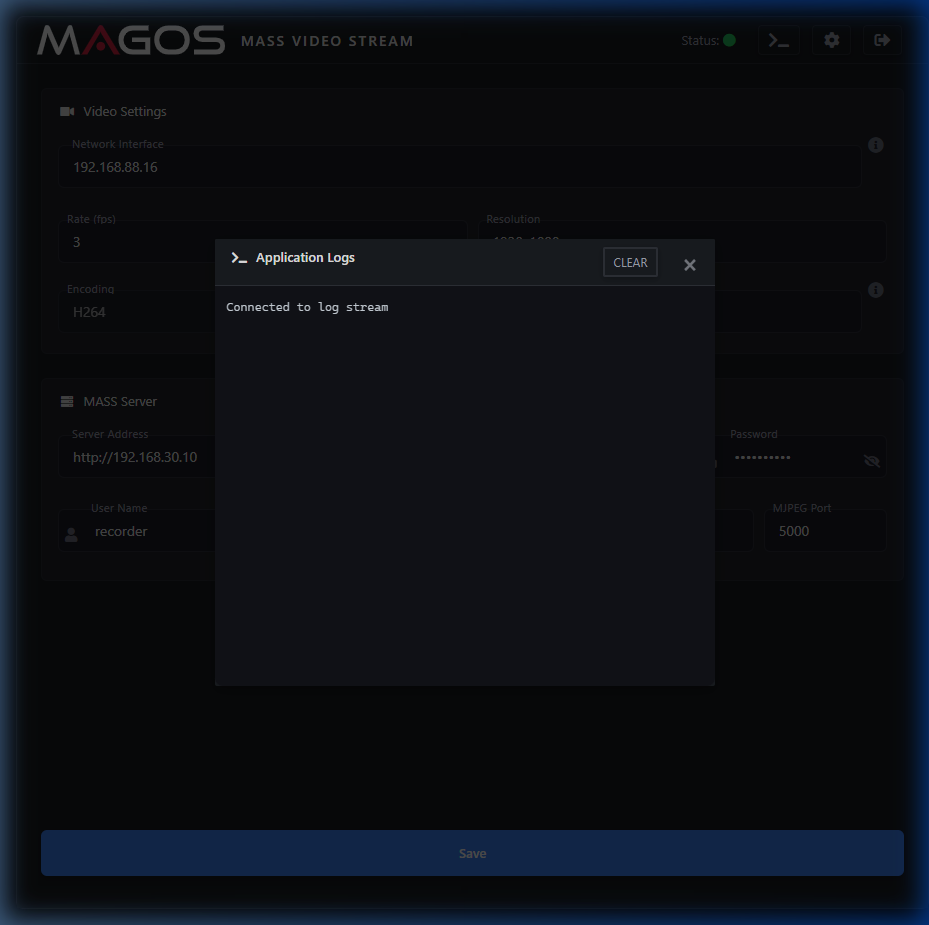
The log panel streams server output in real time. Use the CLEAR button to clear the display (does not delete server logs). Click ✕ to close.
Stream Integration
Once MVS is configured and the Status indicator is green, streams are available at:
| Protocol | URL Format | Default Port |
|---|---|---|
| RTSP | rtsp://<user>:<pass>@<mvs-ip>:<port>/mass | 8554 |
| MJPEG | http://<mvs-ip>:<port> | 5000 |
| ONVIF | Auto-discovery | 8085 |
Connecting an NVR via ONVIF
- In your NVR software, navigate to Device Management or Camera Discovery
- Initiate an ONVIF scan on the MVS host's subnet (or add manually by IP and ONVIF port)
- Enter the ONVIF / RTSP User Name and Password configured in MVS
- The NVR should detect the stream profile and begin recording
Ensure the MVS Network Interface field matches the IP reachable from the NVR.
Viewing the MJPEG Stream in a Browser
Navigate to http://<mvs-ip>:<mjpeg-port> in any web browser.
Playing in VLC
- Open VLC → Media → Open Network Stream (Ctrl+N)
- Enter
rtsp://magos:password@<mvs-ip>:8554/mass - Click Play
Firewall Requirements
| Port | Protocol | Purpose |
|---|---|---|
| 3002 | TCP | Dashboard web interface |
| 8085 | TCP | ONVIF device service |
| 8554 | TCP | RTSP streaming |
| 5000 | TCP | MJPEG HTTP streaming |
Troubleshooting
Open the Log Viewer (>_ icon in the header) — most errors are described directly in the log output.
Status Indicator Is Red
The streaming service has stopped or failed to start. Open the Log Viewer, read the error, correct the configuration, and click Save.
Cannot Connect to MASS Server
Symptoms: Error connecting to MASS server, ECONNREFUSED, or timeout
| Check | Action |
|---|---|
| Server Address is correct | Verify IP/hostname and protocol (http:// or https://) |
| Port is correct | Default MASS port is 3000 |
| Network reachability | Ping the MASS server from the MVS host |
| Firewall rules | Ensure MVS host can reach MASS on the configured port |
| MASS credentials | Verify the MASS User Name and Password |
RTSP / ONVIF Stream Not Available
| Check | Action |
|---|---|
| Service is running | Status indicator must be green |
| Network Interface IP | Must be set to the IP reachable by the NVR — not 127.0.0.1 or 0.0.0.0 |
| Firewall ports open | Ports 8085 (ONVIF), 8554 (RTSP) must be reachable from the NVR |
| Correct credentials | ONVIF/RTSP credentials must match what the NVR is using |
MJPEG Stream Not Working
| Check | Action |
|---|---|
| Correct port | Verify MJPEG Port in the dashboard matches the URL |
| Service running | Status must be green |
| Port not blocked | Ensure port 5000 (or configured port) is not blocked by firewall |
High Memory Usage / Degraded Performance
Enable Browser Rotate in Video Settings. Set to 720 (12 hours) to automatically recycle the headless browser.
Forgot Dashboard Password
Contact your system administrator or Magos Systems support for the configuration file location to reset credentials manually.
Cannot Log In to Dashboard
| Check | Action |
|---|---|
| Correct credentials | Default: admin / password |
| Caps Lock | Ensure Caps Lock is not enabled |
| Cookie support | Browser must accept cookies (required for JWT session) |
| Browser cache | Try a private/incognito window |