MS1460A - Mini AI Appliance
Introduction
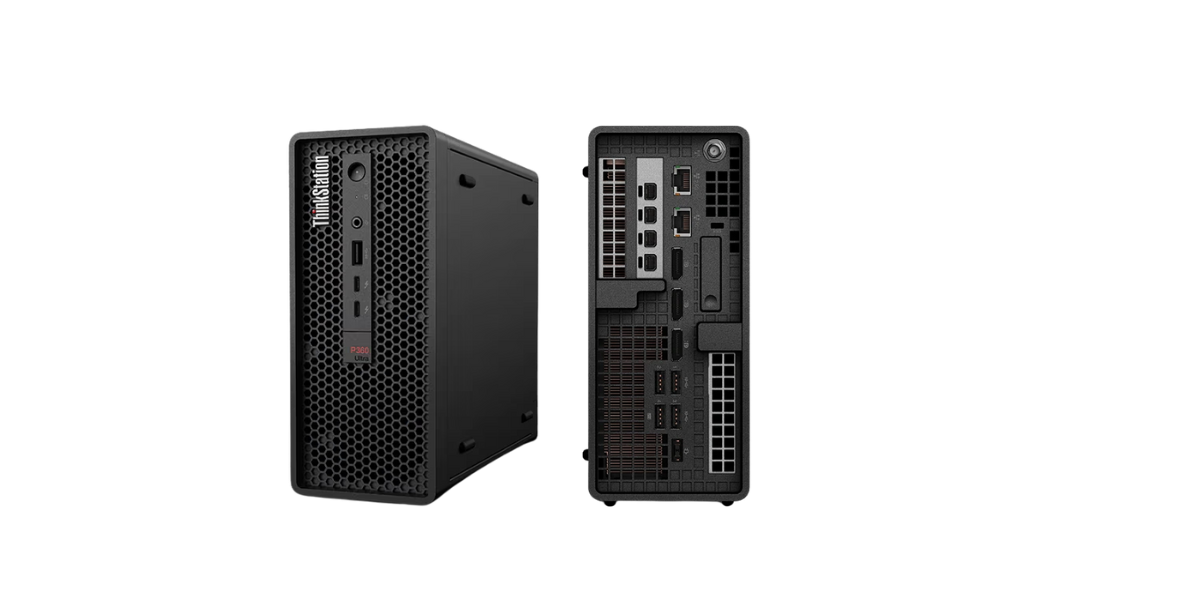
The Magos AI Appliance consists of Magos custom software installed on a Lenovo ThinkStation P360 Ultra customized platform. For product overview and specifications, see the Magos Mini AI Appliance datasheet (PDF).
We strongly recommend reviewing the manufacturer’s user guide prior to installation: Lenovo ThinkStation P360 Ultra User Guide.
This document provides essential setup instructions for the Magos AI Appliance. It is an abbreviated guide highlighting the minimum required configurations. For complete product documentation, please refer to the full MASS+AI Appliance User Manual available in the Magos Partners Portal download section.
Physical Installation
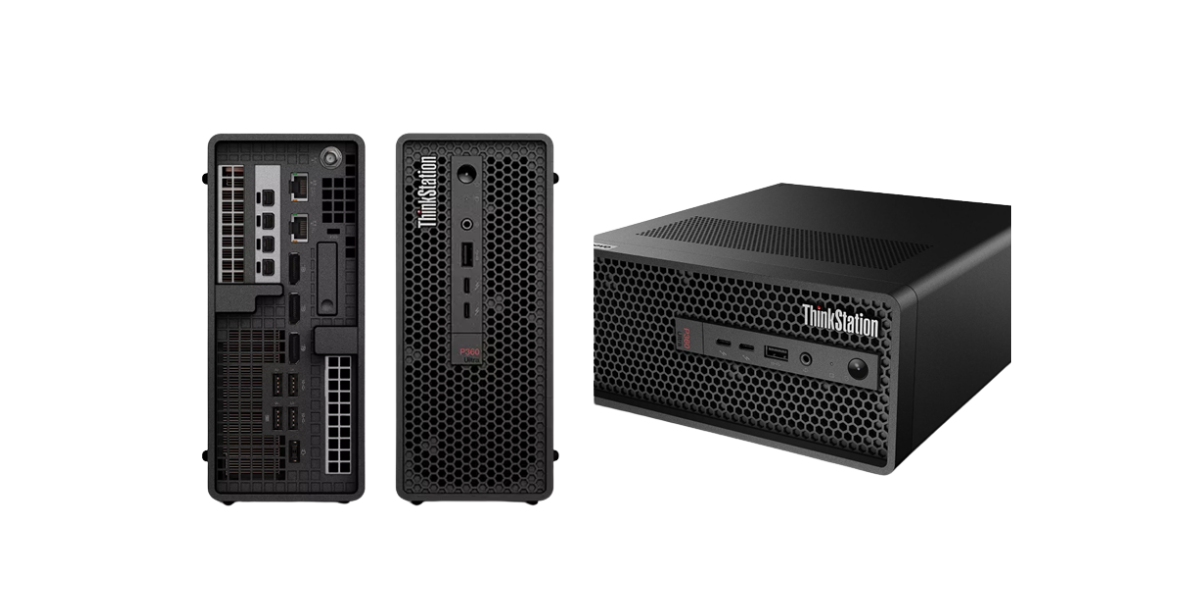
As shown in the figure, the Lenovo ThinkStation P360 Ultra has ventilation vents on the top, front, and rear panels. Ensure the unit is installed in an air-conditioned environment, with all vents unobstructed and sufficient clearance for proper airflow.
AI Appliance
Failure to follow these requirements may cause the unit to overheat, leading to unexpected shutdowns and potentially permanent damage.
Connections
The AI Appliance must be connected to the same Ethernet network as the PTZ cameras in your security system. If the MASS server is hosted on a different machine, it must also be connected to this network.
-
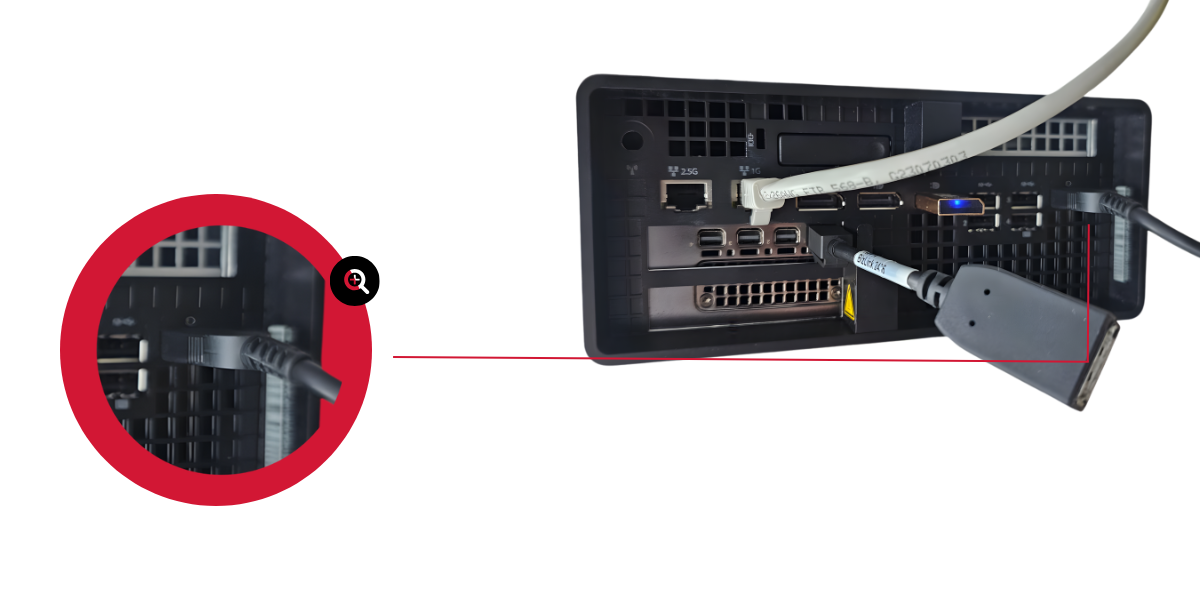
Connect the Appliance to the network using the main Ethernet port, as shown in the figure. For proper operation ensure network infrastructure supports 1Gpbs data rate.
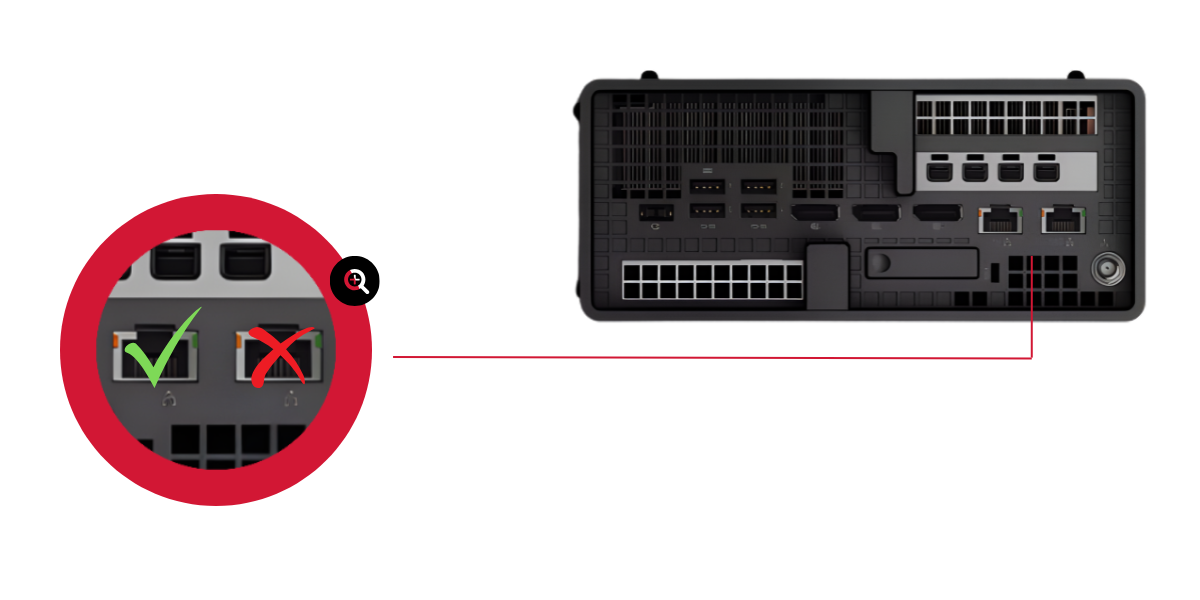
Mini AI Appliance Back Panel and RJ45 Ports
During normal operation, a keyboard, mouse, and monitor are optional, as the AI Appliance does not require a direct user interface.
-
Connect the power cable as shown.
Power Connection
-
Press the power button to turn on the server, as shown.
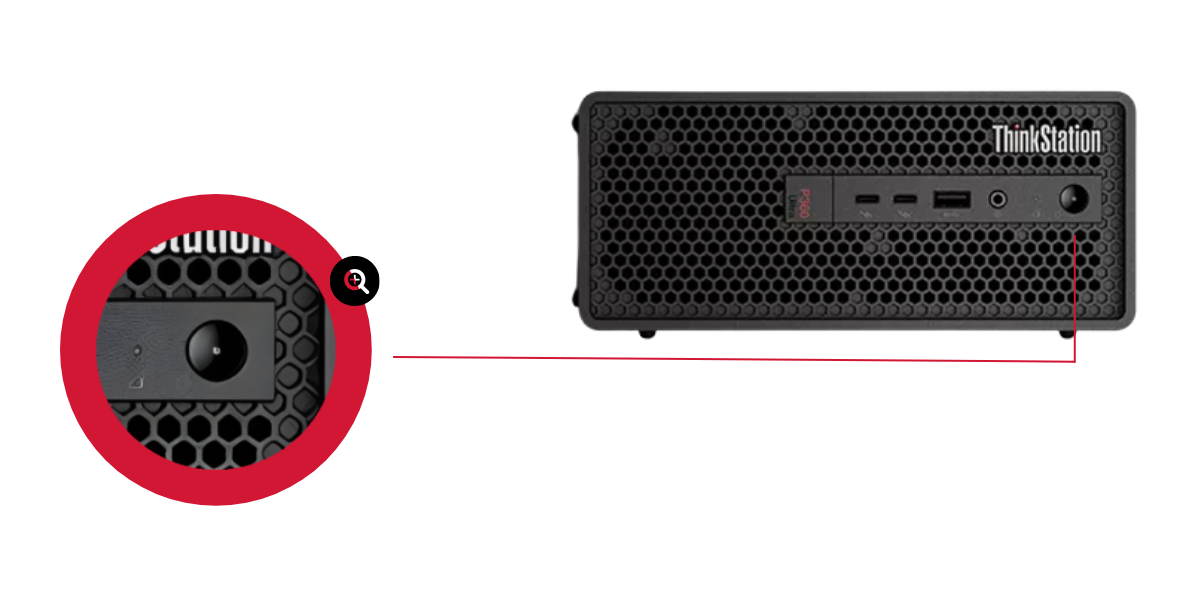
Power Button
Initial Configuration
AI Dashboard
The default IP address of the AI Appliance is 192.168.40.60. There are several methods to configure a static IP address for the AI appliance:
Static IP Configuration via the Radar Manager
- Download the required software: Visit our Partners Portal.
- You will be required to login using the credentials you have received from [email protected]
- Browse to the “Software” tab and download the Radar Manager application as well as the MASS application (if purchased) from the “Downloads” tab.
- Assign IP Address to the Sensor: Use the Radar Manager application to assign a new IP address to the sensor and processing unit. To change IP, right click on the current IP address reported, and choose “Assign IP”.
- Enter the new desired IP address, subnet mask and gateway.

The computer and the sensor must be in the same subnet mask, otherwise they will not communicate. Default IP address for the appliance is 192.168.40.60
Static IP Configuration via the Web Interface (Ad-Hoc Connection)
This method uses the web interface of the AI Appliance and requires a temporary direct connection to a standalone computer.
- Connect the AI Appliance directly to a standalone computer or laptop via Ethernet.
- Use the Radar Manager application to discover the current IP address of the appliance.
- Temporarily assign a static IP address to your computer, ensuring it is on the same subnet as the AI Appliance.
- Open a browser and enter the discovered IP address to access the AI Appliance web interface.
- Use the web interface to assign a new static IP to the appliance.
- After configuration, reconnect the AI Appliance to the local network.

Static IP Configuration via the "Support" Menu
This alternative method uses a text-based service menu accessed directly on the AI Appliance.
-
Connect a keyboard to one of the USB ports on the front panel.
-
Connect a monitor using the mini Displayport as shown in the figure.
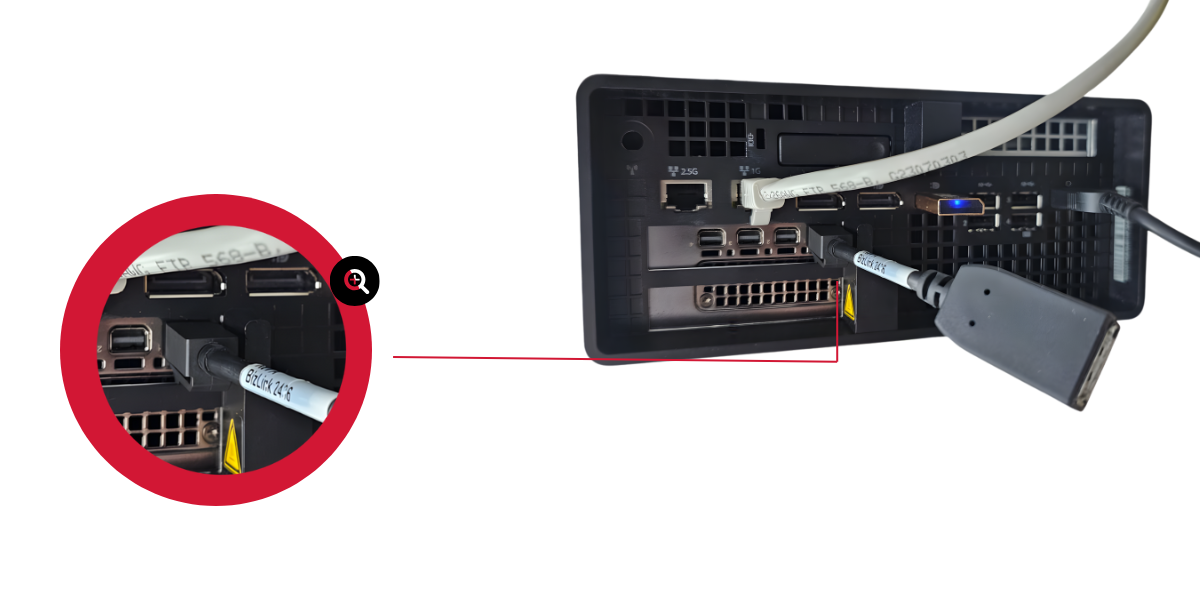
Mini AI Appliance Back Panel Display Connection
The AI Appliance supports DisplayPort output only. To avoid display issues, use a monitor with a native DisplayPort input and avoid using external adapters.
- Power up the appliance. After the boot sequence is completed, press any key on the keyboard. The Magos AI Support Menu login screen will appear. Log in with the following credentials:
- Username: Support
- Password: password
-
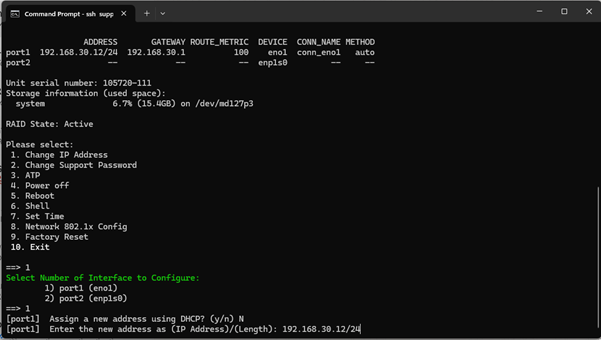
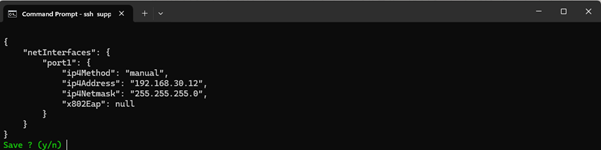
From the service menu, select 1 and press Enter to choose Change IP Address. Then select 1 again to change port1 settings.
-
Press n and Enter to configure a static IP address.
-
When prompted, enter the desired IP address and subnet mask in CIDR format. For example, to set the IP to 192.168.1.10 with a subnet mask of 255.255.255.0, type: 192.168.1.10/24; Then press Enter.
-
Press y and Enter to apply the new IP settings.
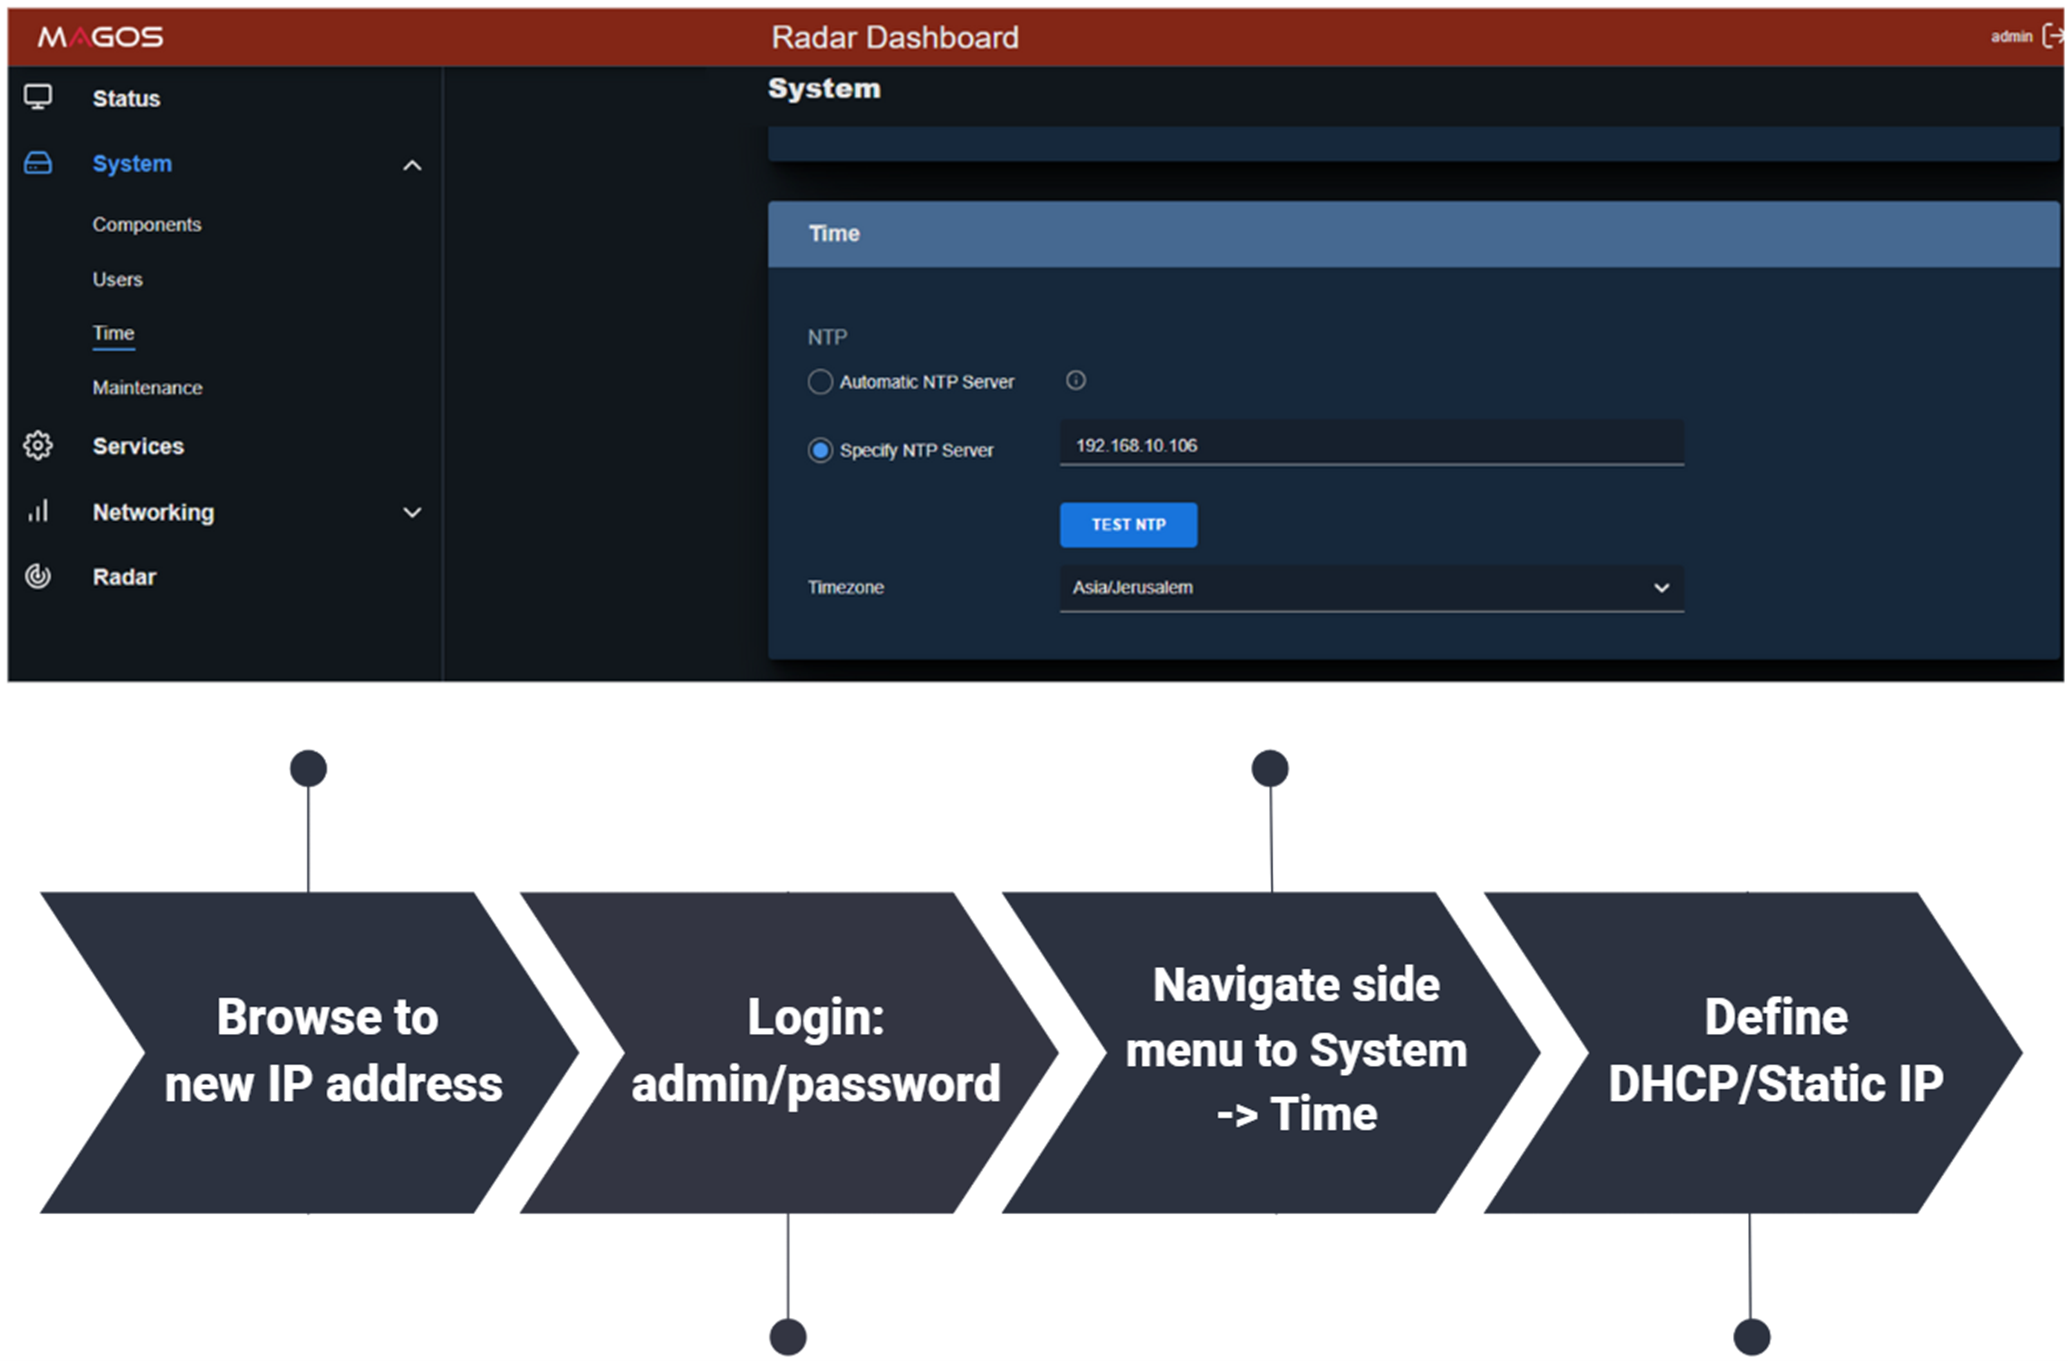
NTP Setting
After configuring the new IP address, it is important to set an NTP server for the radar to ensure proper synchronization with MASS. To configure:
- Log in to the radar dashboard using the newly assigned IP address.
- Set the IP address of the local NTP server.
- Click the "Test NTP" and wait for a "v" sign to verify that the appliance can access the NTP server
AI Setup in MASS
For full instructions, refer to the MASS+AI Appliance User Guide. This section covers only the basic setup steps.
Access the MASS Server
If the MASS server is designated to run on the AI Appliance, it can be accessed from any browser via port 3000. In the browser address bar, enter: (server IP address):3000; on any computer with network access to the AI Appliance.

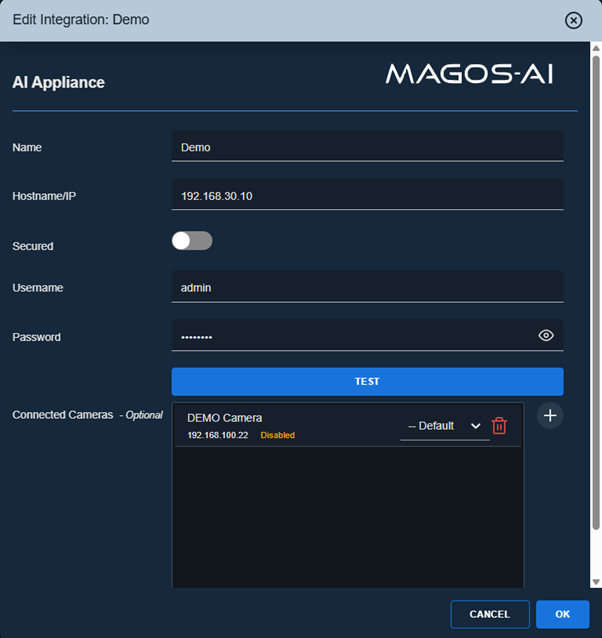
MASS+AI Configuration
Once MASS is licensed and active, add the AI server(s) to the system using the configuration page:
-
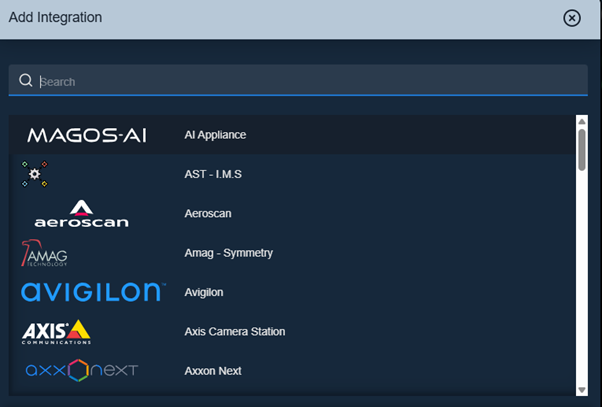
In MASS, open the Integrations section from the side menu, and click the “+” button on the bottom right.
-
Select MAGOS-AI Appliance, and configure the following:
- Reference name for the server
- IP address
- Login credentials (default: admin / password)
-
Click Test to confirm connectivity.
-
Assign cameras defined in MASS to be classified by this server by clicking the “+” button.